Contact Us
Company Registered in Borgo Berga, Vicenza, Italy, 36100.
Registration Number (Partita Iva) 04299640245. Operating Worldwide.
JPM Business Solution
by cherylobal | Oct 18, 2021 | Expat Life, Italy
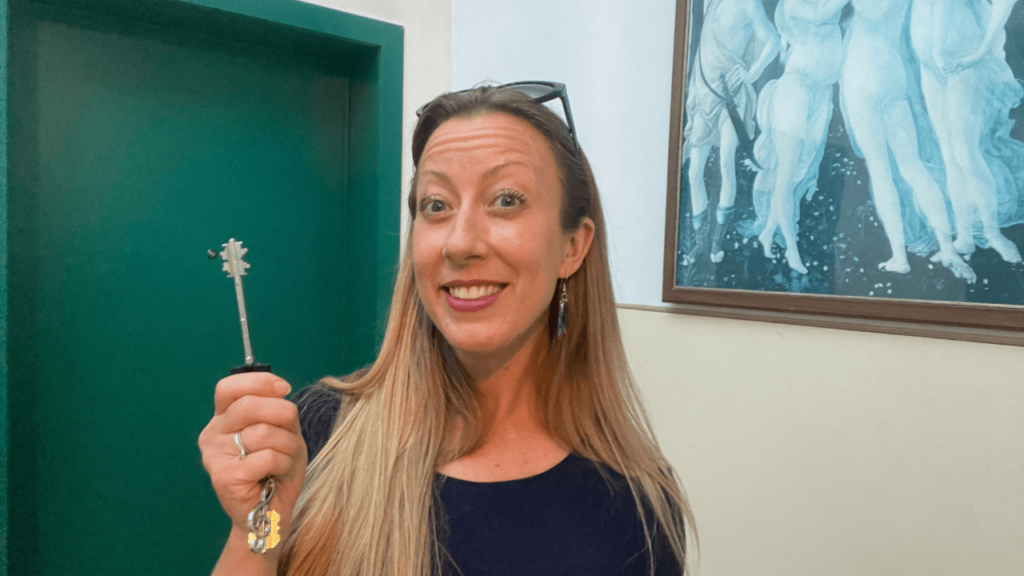
I’ve been lucky enough to buy two apartments in my adopted hometown, Vicenza, in the northeast. In this article, I will take you through the entire process from search, to purchase, to living in it. If you want to know the 12 steps to making your Italian dream home come true, keep reading!
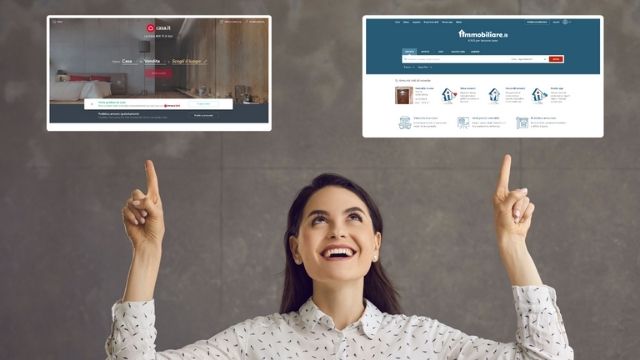
These sites also both have apps, and Italian and English versions. As a pro tip, sign up for email alerts. You can choose the city and even the specific area you want to live in, the price range, the number of bedrooms, and other factors. I had been getting these alerts for a couple of years before buying my place, so I already had a pretty good idea of what I could buy in my budget.
We finally had time to look at apartments during the Christmas-New Year season of 2018-19. I was pleasantly surprised to find that the real estate agents were actually working throughout the holiday season! We saw seven different apartments during this time. Our budget was up to 80,000 euros, or 93,000 dollars. Since we are city dwellers, we were not looking for a detached house. We were in the market for an apartment with 1-2 bedrooms.
I saw the apartment which we later ended up buying listed on immobiliare.it at the price of 75,000 euros. For some reason, I didn’t call for info about it when it was at that price, although I liked it from the photos. Then, one fine day, I saw that apartment marked down to 67,500! Then I realized I really had to call about this place. My husband and I made an appointment, and met the agent and the owner at the apartment for the first viewing on December 29th.
We liked this place right away, and within 5 minutes of setting foot inside, My husband said, “I like it. Let’s buy it!” Of course, I agreed!
This apartment, for us, was situated in a place which was a perfect balance of proximity to nature as well as the city. The size was good too: 65 square meters, or 700 square feet, with one bedroom, one bathroom, a living room, a kitchen, and of course, the garage. It was the top floor of a 3-floor building, so there would be no disturbance from people living above us.
What ultimately sold us on this place where the following factors:
-The floor. It had a stunning floor made up of different color marble pieces, called Palladiana, named after the world-famous architect Andrea Palladio, who came from this area.
-The shape. It’s in an L shape, which maybe some people wouldn’t like, but we did. All the rooms were connected by two long corridors, and we adored this layout. We figured that it would allow for more privacy and less disturbance from noise. If someone’s cooking in the kitchen, for example, you wouldn’t hear it from the living room, because it’s so far.
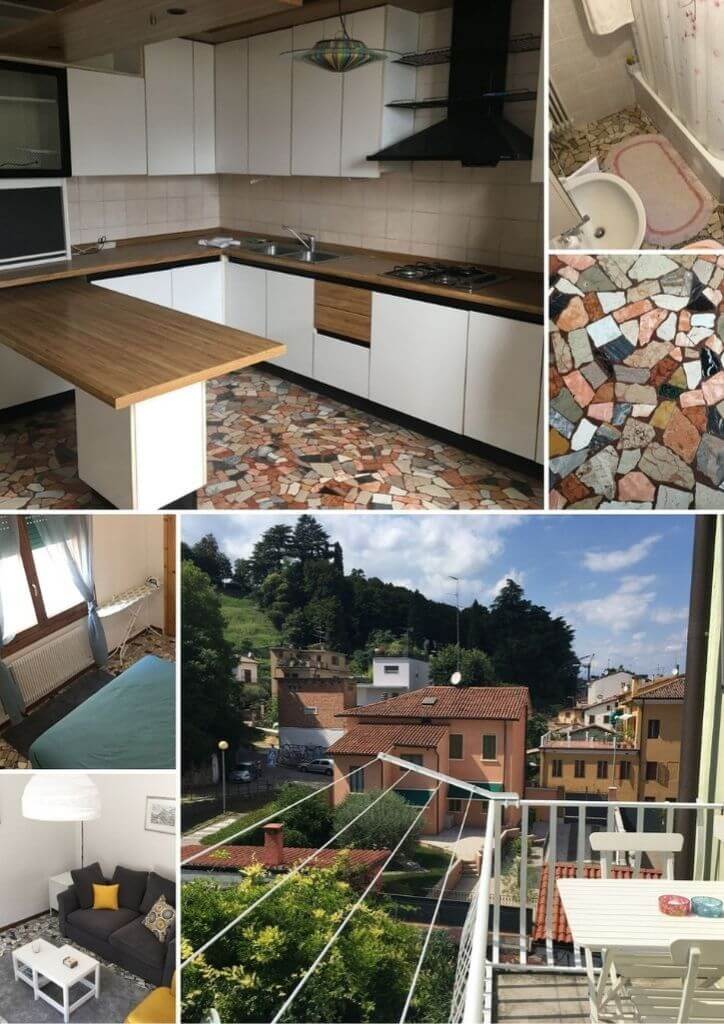
-The condition. There was not much work needed, and the kitchen was still intact. Many Italian apartments are sold without any of the kitchen furniture.
-The balcony. The balcony in the back of the house opens up to a green symphony for the eyes. There’s easy access to the bike path which runs just behind the place, so you can get outside for fresh air and exercise so easily.
-The proximity to the city center. Walk just 5 minutes and you’re in the historic center of Vicenza.
-The garage. We have our own parking space in a shared garage.
-The price. We ended up bargaining on the price. Keep reading to find out how much we actually paid for it.
The next step would be to put in an offer. But before that, we asked a trusted expert to have a look at it and let us know if there was anything wrong with it.
We asked a friend’s cousin, an architect, to have a look at the apartment with us and let us know if there were any red flags. Luckily, the architect gave us a positive review of the place, so it was time to make our offer!
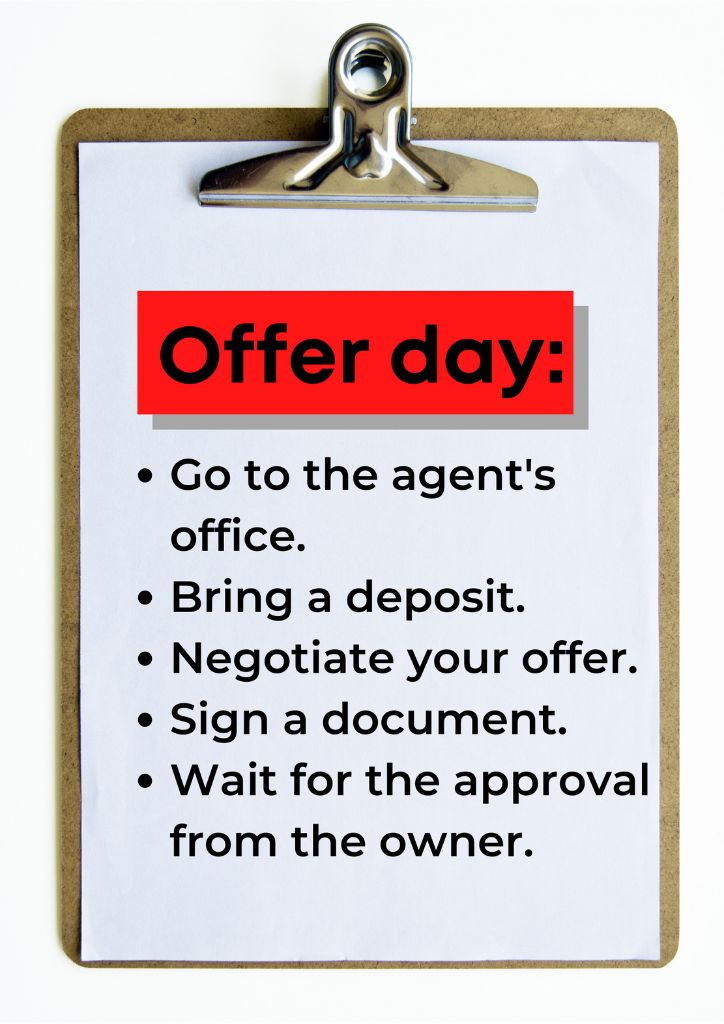
How this works is: you show up at the real estate agent’s office. You bring with you a check for a deposit, which can be a small amount. I think I brought a check for 3,000 euros. They never actually cash in this check. It’s just there to show that you’re serious. (In theory, if you find another place and disappear between the offer and the appointment with the notary, they would probably keep this check and cash it). You negotiate your offer with the agent, write your offer on a document, and sign it.
Now here’s the tricky part. The owner of the house is not involved at this stage. I thought I’d have chance to negotiate the price with the owner in this meeting. We wanted to try and bring it down to 62 or 63,000.
But the owner wasn’t there, and the agent acts a wall between the owner and the buyer, to mediate the price you end up offering. The agent wouldn’t let me write lower than 65,000 on the paper. So, I wrote 65,000 on the offer document and signed it.
Then, that document goes to the owner, and he can accept or reject your offer. Luckily, he accepted it, and of course, we were thrilled!
The agent will make the appointment with the notary because usually they work with certain notaries. I guess you could choose your own notary, but I just let the agent recommend one. Before making the appointment though, we were asked if we would need to apply for a mortgage (mutuo in Italian), or if we would pay for the whole apartment at the time of purchase. Since were prepared to pay in full, that meant the whole thing could go faster, as there was no delay in dealing with the bank.
Also, as a side note, keep in mind that if you are an expat who is not a resident of Italy, it will be difficult or impossible to get a mortgage from an Italian bank. Therefore, if you can, pay for all up front and save the hassle.
Also, you will need to have an Italian bank account, which you can get even as a non-resident. Finally, you will need to get a Codice Fiscale, or Fiscal Code, in order to make the purchase. It’s very easy to do and just requires a visit to the local Agenzia delle Entrate.
We were able to get an appointment on January 17th, just 10 days later. Normally notaries in Italy are extremely busy and require some waiting to get an appointment, so 10 days wasn’t too bad.

The first step on the day of the purchase is to visit your bank in the morning and request an assegno circolare, or cashier’s check, for the entire cost of the house. You can’t use a normal check from your personal checkbook for the house cost, but you can use personal checks for the notary fee and the agent fee. You also can’t transfer money directly to anyone from your bank prior to the actual signing of the house deed. If you don’t live in Italy yet, you can open a non-resident bank account, in fact you need to do this so you can get that check from the bank.
So then you sit down at a table with the owner, the agent, and the notary. The notary reads you the entire house deed. As a pro tip, ask for a copy of the house deed a day before the purchase, especially if you’re like me, and Italian is not your first language. That way you have plenty of time to read through it carefully. The notary will ask in advance if you can understand Italian.
In my case, since I speak Italian, I didn’t need an interpreter. If you don’t speak Italian, you would have to get an interpreter for the day of the house deed signing. Your interpreter has to become your Power of Attorney through another notarized document which you sign a few days prior to signing the house deed.
There is a lot of paper-passing and document signing, you hand over the check, and they hand over the keys. Then you’re a house owner, and it’s time to celebrate!
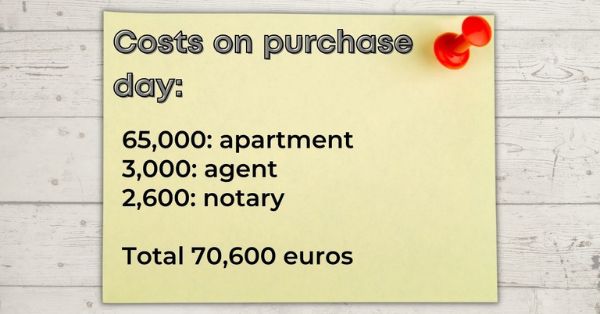
Here’s a total of all our expenses on the day of the house purchase:
The next day, I got homeowner’s insurance: a basic one to protect me if there is some disaster in the house that causes any damage in the building.
After that, there was a gap in the project, since I had to go abroad to work from January until May. I returned in May to begin the next phase of the process:
-Utilities
-Fixings
-Furnishings
The first step is to get the utilities hooked up. If the utilities are already connected, and you just change everything to your name, you do a ‘voltura.’ That means keep the supply open, but change the account owner. In my case, the apartment had been empty for a few years, and the utilities were not connected, so I had to make a new contract.
If you have to start a new contract, it takes time because the local energy supply company comes out to verify the numbers on the meters, and then the supply will open. It can happen anywhere from 1-3 weeks. As a side note, it used to be that utility supply was a regulated industry and there was just one, government-run utility company. Now the industry is deregulated, and you can choose the company to supply your utilities.
Then it was time to do some work inside the apartment. It was all minor, but I wanted to improve a few bits and pieces, before getting the furniture in.
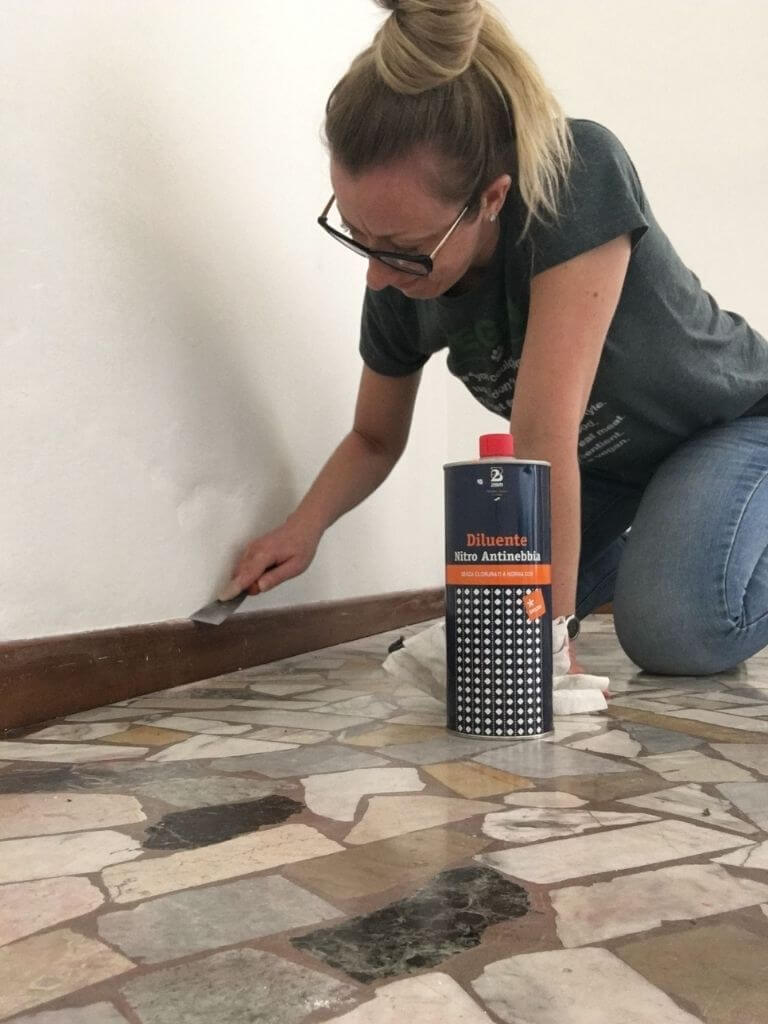
I did some small things myself, but for most tasks I hired a tuttofare (“handyman”), a freelancer who does all types of work in the house. Also, a friend of a friend came to help out. These two helpers gave the apartment a deep cleaning, put caulk between the tiles in the bathroom, painted the balcony, installed screens, and many other things.
As a side note, it’s always good to go through your network and get trusted people through friend recommendations to do the work in your house.
Then it was time to furnish it, which we did all at IKEA. By the way, IKEA is called “ee-KAY-uh” in Italy. Some items we assembled ourselves, while the bigger items got assembled by the guys who delivered them. It was a lot of fun putting the house together and seeing it come to life before our eyes!
We also got some new appliances or installations in the house, including:
• Air conditioning in 2 rooms
• Screens in all windows
• New boiler
• New washing machine
All in all, the fixings and furnishing took 6 weeks. By the end of June, the apartment was ready to live in, and we couldn’t be happier!
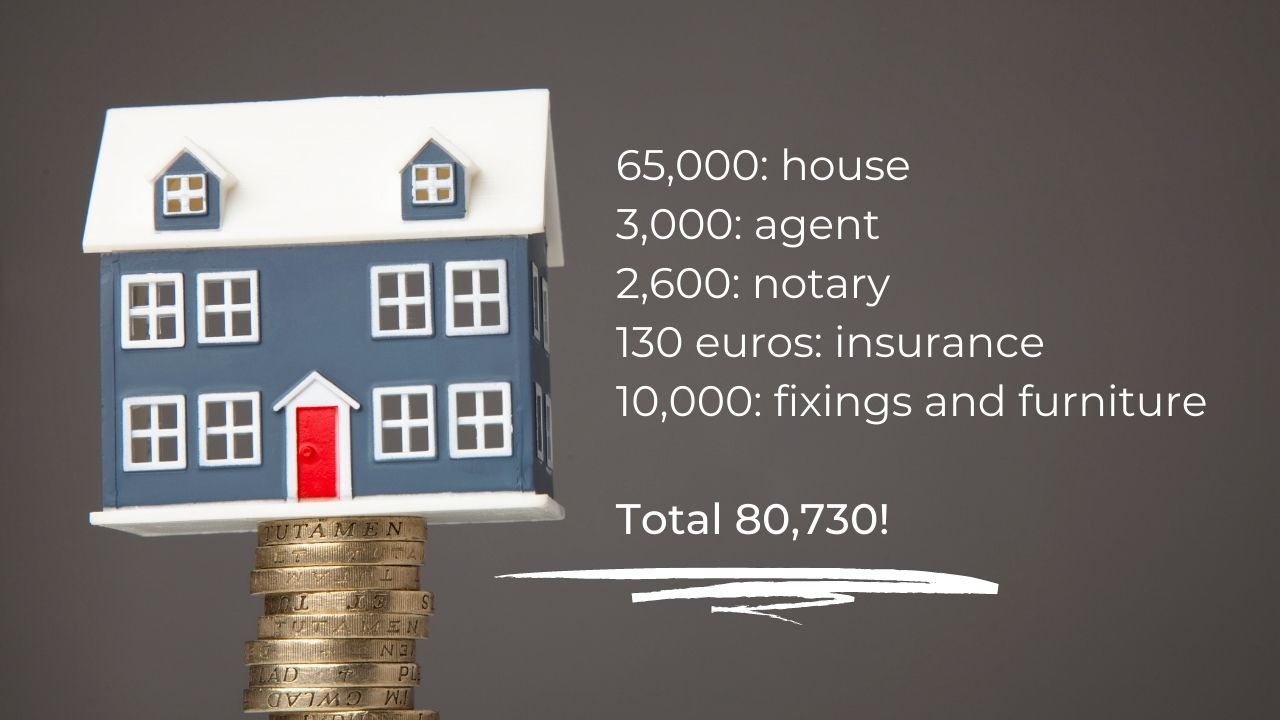
So here is the grand total of what we spent:
All in all, these are the 12 Steps for buying your DREAM HOME in Italy! I hope this article gives you a good idea of the process, times, and cost of buying your dream home in Italy. It was well worth it, a rewarding adventure, and one that I would do all over again.
Oh wait—I DID do it again when I bought the second apartment last year! That apartment is in the historic center of Vicenza, and it’s currently being renovated. I’m making a video documentary of the renovations from start to finish. Subscribe to my YouTube Channel so you’ll know when that comes out, so you can learn what it’s like to buy a place AND renovate it in Bella Italia! Ciao for now!
Contact us to learn more.
YouTube Channel click here
Company Registered in Borgo Berga, Vicenza, Italy, 36100.
Registration Number (Partita Iva) 04299640245. Operating Worldwide.
JPM Business Solution
| Cookie | Duration | Description |
|---|---|---|
| cookielawinfo-checbox-analytics | 11 months | This cookie is set by GDPR Cookie Consent plugin. The cookie is used to store the user consent for the cookies in the category "Analytics". |
| cookielawinfo-checbox-functional | 11 months | The cookie is set by GDPR cookie consent to record the user consent for the cookies in the category "Functional". |
| cookielawinfo-checbox-others | 11 months | This cookie is set by GDPR Cookie Consent plugin. The cookie is used to store the user consent for the cookies in the category "Other. |
| cookielawinfo-checkbox-advertisement | 1 year | Set by the GDPR Cookie Consent plugin, this cookie is used to record the user consent for the cookies in the "Advertisement" category . |
| cookielawinfo-checkbox-necessary | 11 months | This cookie is set by GDPR Cookie Consent plugin. The cookies is used to store the user consent for the cookies in the category "Necessary". |
| cookielawinfo-checkbox-performance | 11 months | This cookie is set by GDPR Cookie Consent plugin. The cookie is used to store the user consent for the cookies in the category "Performance". |
| CookieLawInfoConsent | 1 year | Records the default button state of the corresponding category & the status of CCPA. It works only in coordination with the primary cookie. |
| viewed_cookie_policy | 11 months | The cookie is set by the GDPR Cookie Consent plugin and is used to store whether or not user has consented to the use of cookies. It does not store any personal data. |
| Cookie | Duration | Description |
|---|---|---|
| __cf_bm | 30 minutes | This cookie, set by Cloudflare, is used to support Cloudflare Bot Management. |
| Cookie | Duration | Description |
|---|---|---|
| _ga | 2 years | The _ga cookie, installed by Google Analytics, calculates visitor, session and campaign data and also keeps track of site usage for the site's analytics report. The cookie stores information anonymously and assigns a randomly generated number to recognize unique visitors. |
| _gat_gtag_UA_178010500_1 | 1 minute | Set by Google to distinguish users. |
| _gid | 1 day | Installed by Google Analytics, _gid cookie stores information on how visitors use a website, while also creating an analytics report of the website's performance. Some of the data that are collected include the number of visitors, their source, and the pages they visit anonymously. |
| CONSENT | 2 years | YouTube sets this cookie via embedded youtube-videos and registers anonymous statistical data. |
| Cookie | Duration | Description |
|---|---|---|
| ckid | never | This cookie is set by the provider Yieldoptimizer. This cookie is used to track visitors on multiple websites, inorder to serve them with relevant advertisement based on visitor's interest. |
| VISITOR_INFO1_LIVE | 5 months 27 days | A cookie set by YouTube to measure bandwidth that determines whether the user gets the new or old player interface. |
| YSC | session | YSC cookie is set by Youtube and is used to track the views of embedded videos on Youtube pages. |
| yt-remote-connected-devices | never | YouTube sets this cookie to store the video preferences of the user using embedded YouTube video. |
| yt-remote-device-id | never | YouTube sets this cookie to store the video preferences of the user using embedded YouTube video. |
| yt.innertube::nextId | never | This cookie, set by YouTube, registers a unique ID to store data on what videos from YouTube the user has seen. |
| yt.innertube::requests | never | This cookie, set by YouTube, registers a unique ID to store data on what videos from YouTube the user has seen. |
| Cookie | Duration | Description |
|---|---|---|
| SGPBShowingLimitationPage5221 | 1 day | No description |